ARFoundation小汽车游戏
内容:
1.检测真实世界的飞机并在其上绘制一个运动场。
2.从相机的视角投射光线并检测与平面的交点。
3.对现实世界的光照条件做出反应,让您的游戏更加逼真。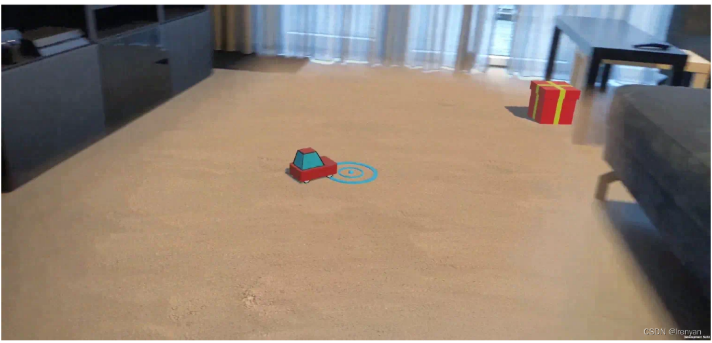
原文链接
https://codelabs.developers.google.com/arcore-unity-ar-foundation#1
1.环境搭建
创建urp
1.1环境、package
ARFoundation
ARCore XR Plugin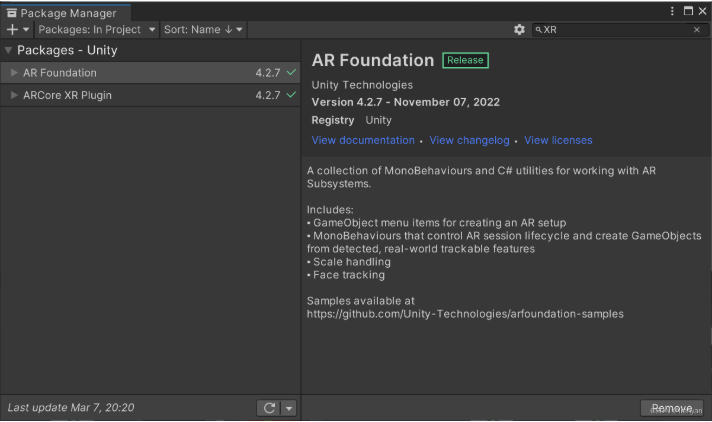
导入ARCore_Car包
1.2设置other settings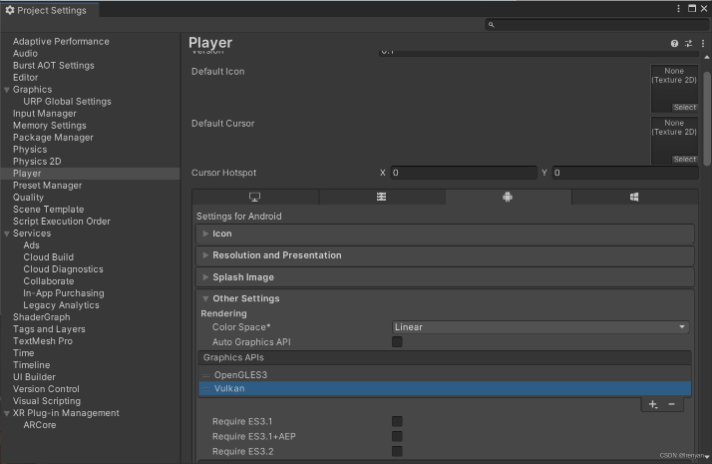
删除vulkan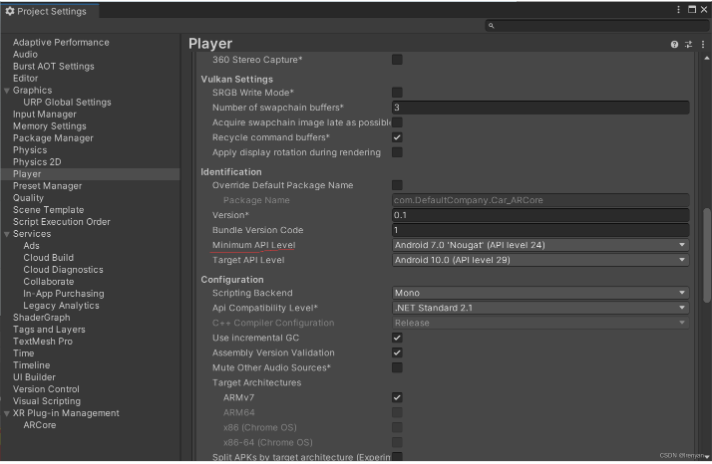
Minimum API Level,将最低 API 级别设置为 24。
2.添加场景所需元素
2.1
删除SampleScene中的其他所有东西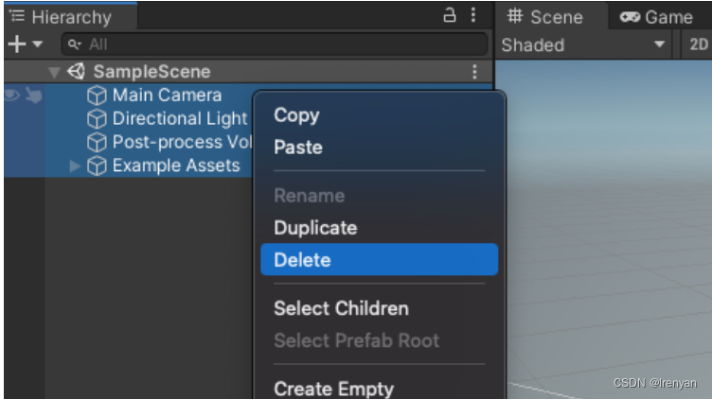
添加 AR Foundation 对象。右键单击“Hierarchy”窗口,添加:
1.XR > AR Session:此对象控制 AR 体验的生命周期。
2.XR > AR Session Origin:该对象将 AR 坐标转换为 Unity 世界坐标。
3.Light > Directional Light:这提供了一个光源来照亮游戏对象。
2.2设置渲染管线
Unity 的通用渲染管线需要进行一项更改才能与 AR Foundation 兼容。
1.在“项目”窗格中,浏览“资产”>“设置”以找到UniversalRenderer
(原文是ForwardRenderer)。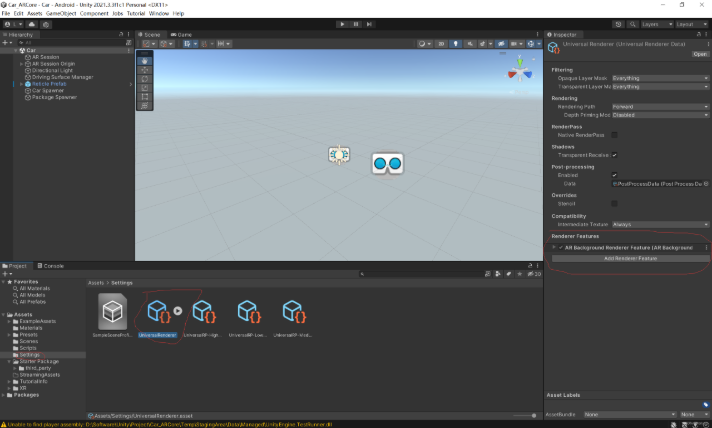
点击UniversalRenderer
在 Inspector 窗格中,使用Add Renderer Feature添加AR Background Renderer Feature。该组件将在您的场景中渲染相机源。
2.3添加组件
1.添加ARPlaneManager组件
创建一个空的GameObject,将其重命名为Driving Surface Manager.。在 Inspector 窗格中,单击Add Component以添加AR Plane Manager。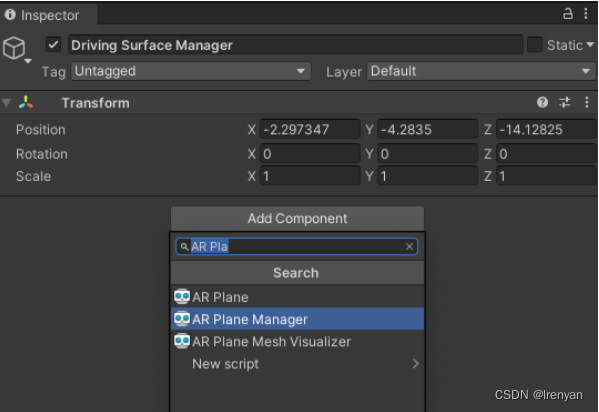
ARPlane Manager如下设置,Plane Prefab中的预制体在ARCore_Car包中。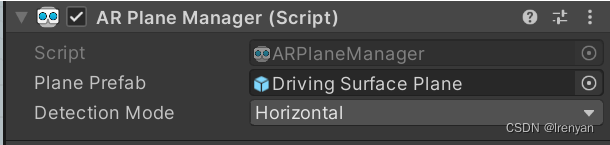
2.添加ARRaycastManager组件
在Hierarchy中选中Driving Surface Manager,在 Inspector 中,单击Add Component以将ARRaycastManager组件添加到您的游戏对象。
此组件不需要进一步配置。
3.添加DrivingSurfaceManager组件
确保调用的对象Driving Surface Manager在Hierarchy窗格中被选中。
在 Inspector 中,单击Add Component以将DrivingSurfaceManager组件添加到您的游戏对象。
此组件不需要进一步配置。

3.对检测到的平面进行命中测试
将Reticle Prefab拖动到项目的Hierarchy窗格中,将其放置到场景中,其Inspector窗口设置如下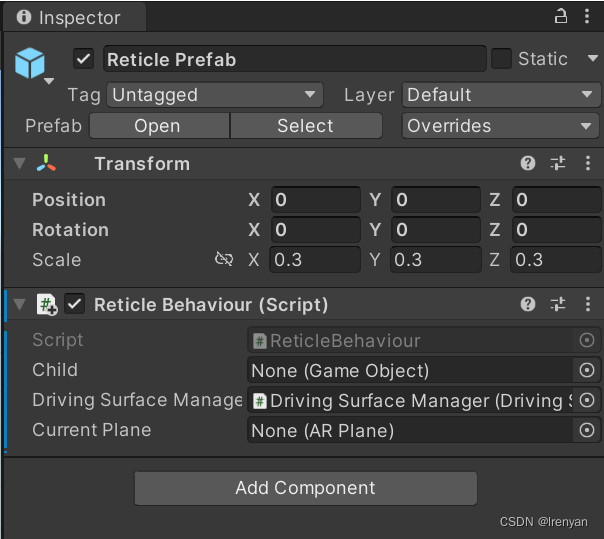
2.编辑ReticleBehaviour脚本中的update
private void Update()
    {
        // TODO: Conduct a ray cast to position this object.
        var screenCenter = Camera.main.ViewportToScreenPoint(new Vector3(0.5f, 0.5f));
        var hits = new List<ARRaycastHit>();
        DrivingSurfaceManager.RaycastManager.Raycast(screenCenter, hits, TrackableType.PlaneWithinBounds);

        CurrentPlane = null;
        ARRaycastHit? hit = null;
        if (hits.Count > 0)
        {
            // If you don't have a locked plane already...
            var lockedPlane = DrivingSurfaceManager.LockedPlane;
            hit = lockedPlane == null
                // ... use the first hit in `hits`.
                ? hits[0]
                // Otherwise use the locked plane, if it's there.
                : hits.SingleOrDefault(x => x.trackableId == lockedPlane.trackableId);
        }


        if (hit.HasValue)
        {
            CurrentPlane = DrivingSurfaceManager.PlaneManager.GetPlane(hit.Value.trackableId);
            // Move this reticle to the location of the hit.
            transform.position = hit.Value.pose.position;
        }
        Child.SetActive(CurrentPlane != null);
    }
原文中if (hits.Length > 0)会报错,所以将Length改为Count。
3.按原文操作,十字线显示会出现问题,并不会如下图显示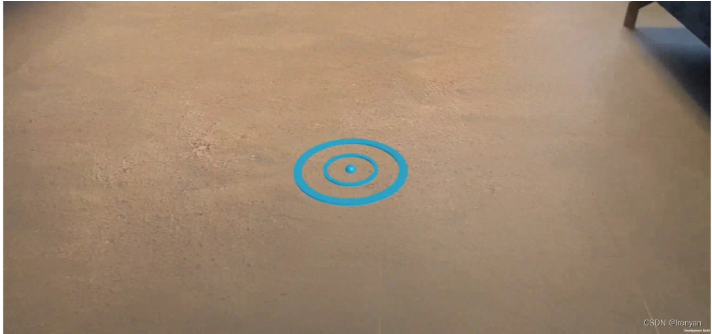
所以还需要修改DrivingSurfaceManager脚本。
只需修改如下内容
private void Start()
    {
        PlaneManager = GetComponent<ARPlaneManager>();
        RaycastManager = GetComponent<ARRaycastManager>();
    }
4.创建汽车```
添加一个CarManager到你的场景,在Hierarchy中,创建一个新的空GameObject,
将其重命名为Car Spawner。选择该对象,在层次结构窗格中,单击添加组件以添加CarManager组件。
CarManager通过单击每个字段的选择器来设置 的依赖项:
Car Prefab:在Assets中,选择Car Prefab。
Reticle:在场景中,选择Reticle Prefab。
Driving Surface Manager:在Scene中,选择Driving Surface Manager。
此CarManager行为会在标线所在的平面上生成一辆玩具车。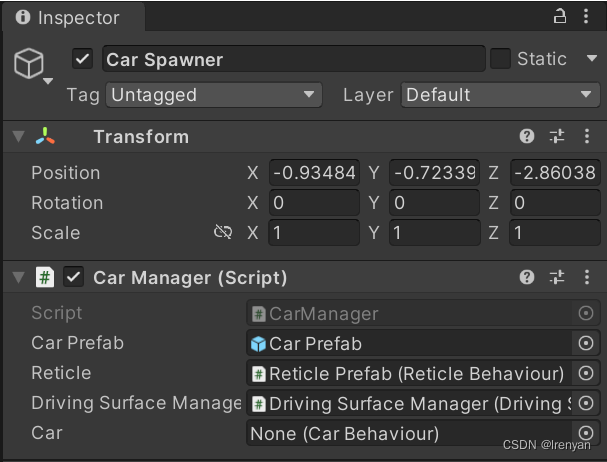
5.添加小礼盒
现在玩家可以控制场景中的一个实体,为玩家提供一个可以开车前往的目的地。
GameObject在层次结构中创建一个新的空白。
将其重命名为Package Spawner.
选择您创建的对象。在Hierarchy窗格中,单击Add Component以将组件添加PackageSpawner到其中。
PackageSpawner通过单击每个字段的选择器来设置 的依赖项:
Package Prefab:在Assets中,选择Package Prefab。
Driving Surface Manager在场景中,选择Driving Surface Manager。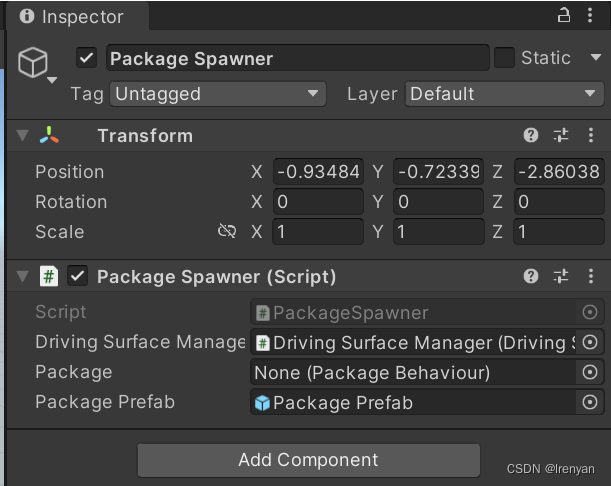
4.设置光照估算
使用 ARCore 的光照估计 API 根据传入的相机帧来检测现实世界中存在的光照。此信息将用于调整场景的照明以匹配真实世界的照明。
1.启用光照估算
在Hierarchy中,展开AR Session Origin并选择AR Camera对象。
在Inspector中,展开AR Camera Manager脚本。
将Lighting Estimation字段更改为Everything。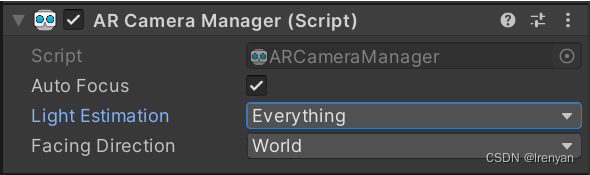
2.修改定向光
在Hierarchy中,选择Directional Light对象。将LightEstimation组件添加到其中。在FrameReceived()函数中,添加:
ARLightEstimationData lightEstimation = args.lightEstimation;

if (lightEstimation.averageBrightness.HasValue)
    Light.intensity = lightEstimation.averageBrightness.Value;

if (lightEstimation.averageColorTemperature.HasValue)
    Light.colorTemperature = lightEstimation.averageColorTemperature.Value;

if (lightEstimation.colorCorrection.HasValue)
    Light.color = lightEstimation.colorCorrection.Value;

if (lightEstimation.mainLightDirection.HasValue)
    Light.transform.rotation = Quaternion.LookRotation(lightEstimation.mainLightDirection.Value);

if (lightEstimation.mainLightColor.HasValue)
    Light.color = lightEstimation.mainLightColor.Value;

if (lightEstimation.mainLightIntensityLumens.HasValue)
    Light.intensity = lightEstimation.averageMainLightBrightness.Value;

if (lightEstimation.ambientSphericalHarmonics.HasValue)
{
    RenderSettings.ambientMode = AmbientMode.Skybox;
    RenderSettings.ambientProbe = lightEstimation.ambientSphericalHarmonics.Value;
}
打包成APK,先扫描平面,然后点击屏幕就会出现小车,它会跟随十字线移动,触碰到礼品盒,就会在平面的其他位置生成新的礼品盒。原版的平面会出现飘逸现象,如果想更真实,可以在AR Camera中添加下图组件,修改红圈部分。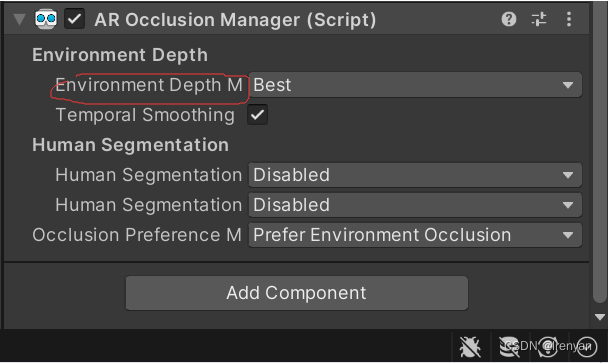
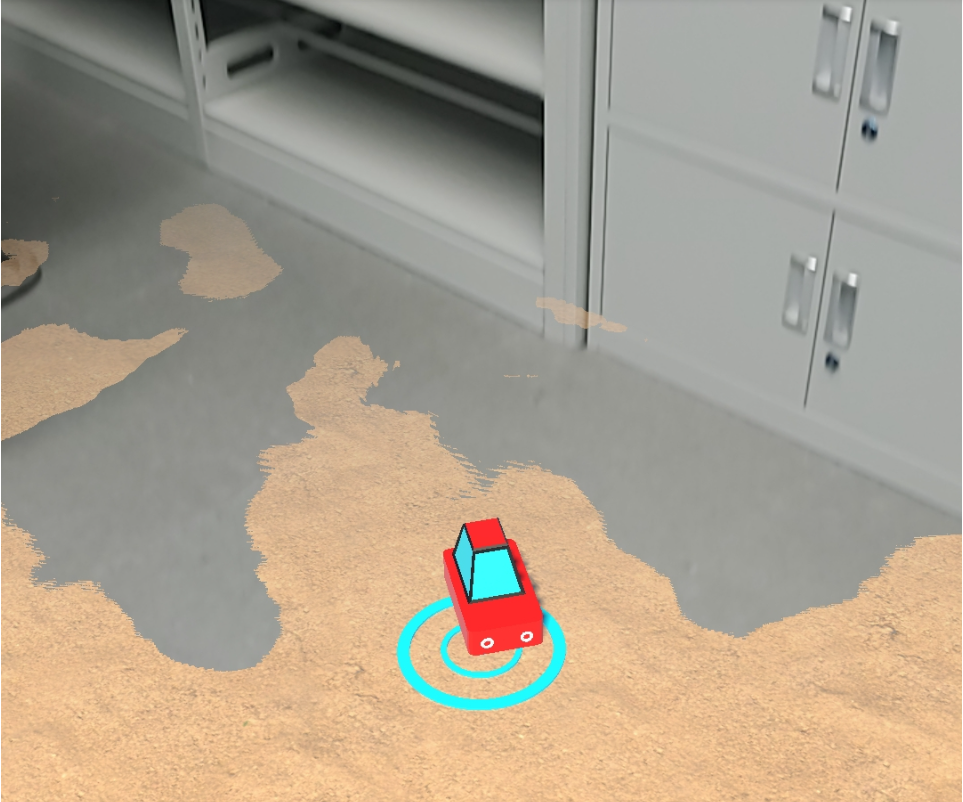
实测图
评论